Laravel 12 Passport for Beginners: Your Simple Guide to Secure API Authentication
Kritim Yantra
Jun 01, 2025
Imagine you're building an apartment building (your Laravel application). To keep residents safe, you need a sophisticated access system that allows:
- Residents to enter their own apartments
- Guests to visit specific units
- Maintenance staff to access common areas
- Delivery drivers to enter temporarily
Laravel Passport is that access system - a powerful OAuth2 server that manages API authentication securely and professionally. Let's break it down in simple terms!
🧩 What is Passport Exactly?
Passport adds professional-grade security to your Laravel API through:
- Access tokens: Digital keys that grant permissions
- OAuth2 protocols: Industry-standard security rules
- Authentication flows: Different ways to verify identity
� Passport vs Sanctum: Which to Choose?
| Passport | Sanctum |
|---|---|
| Full OAuth2 implementation | Simple API token authentication |
| Best for third-party apps | Best for your own SPA/mobile apps |
| Complex permission systems | Basic token-based access |
Choose Passport when: You're building something like "Login with Google/Facebook" or allowing other developers to connect to your API.
🛠️ Installation Made Simple
- Install Passport:
composer require laravel/passport
- Run setup commands:
php artisan install:api --passport
php artisan migrate
php artisan passport:keys
- Update your User model:
class User extends Authenticatable implements OAuthenticatable
{
    use HasApiTokens; // Adds token superpowers to users
}
- Configure auth guards:
// config/auth.php
'guards' => [
    'api' => [
        'driver' => 'passport', // Use Passport for API auth
        'provider' => 'users',
    ],
],
🔑 The 4 Main Key Systems (Grant Types)
Authorization Code Grant
The standard "Login with..." flow: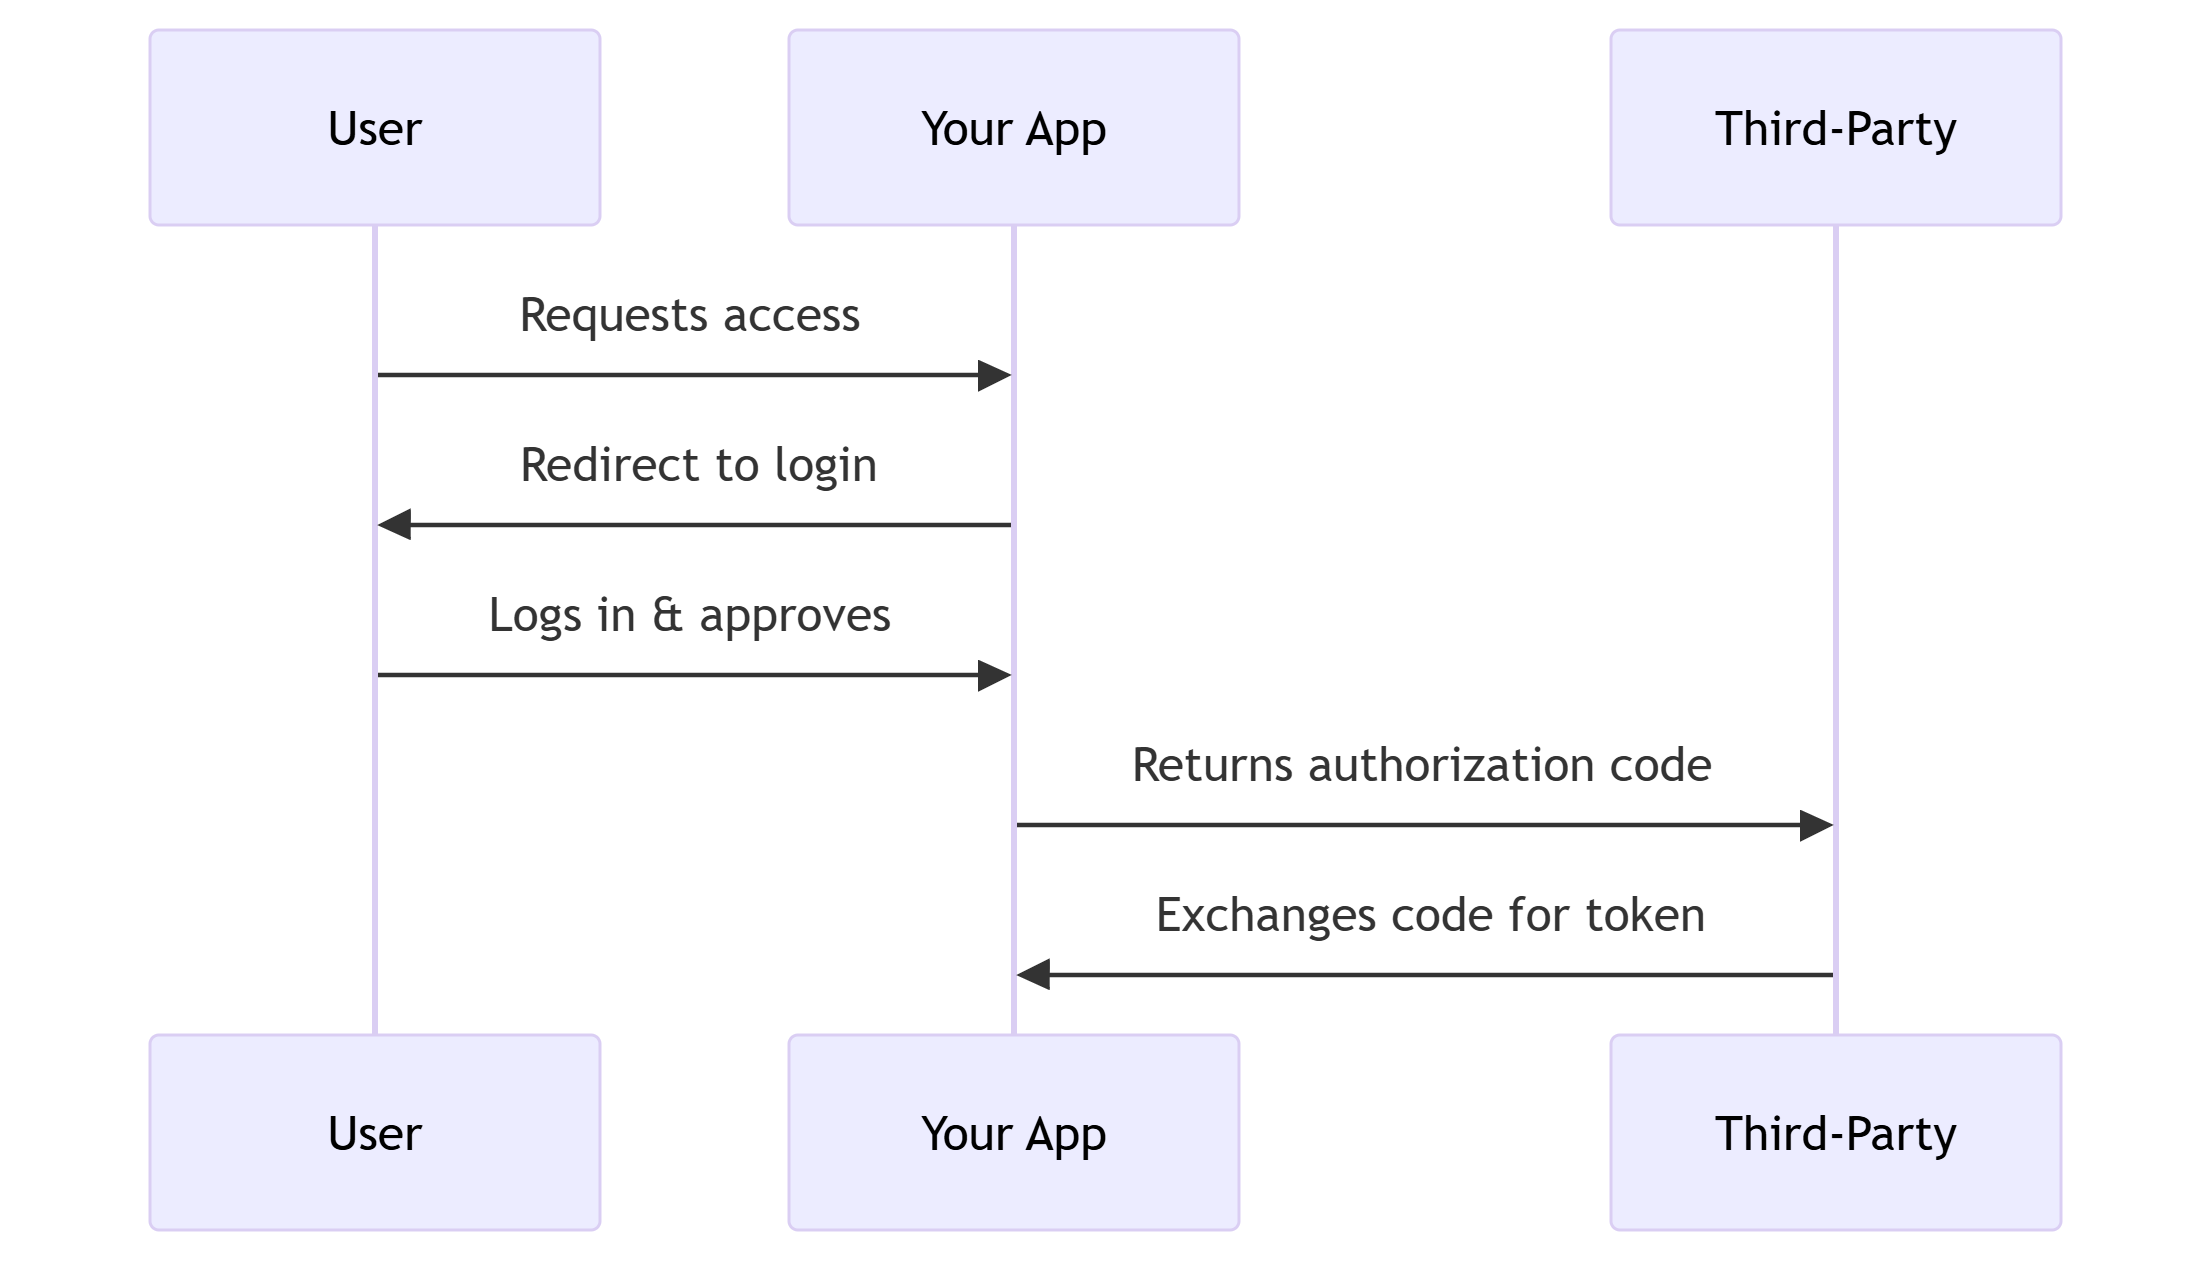
Password Grant (Legacy)
User provides email/password directly to get token
Note: Not recommended for new projectsClient Credentials Grant
For machine-to-machine communication:$token = Http::post('/oauth/token', [ 'grant_type' => 'client_credentials', 'client_id' => 'your-id', 'client_secret' => 'your-secret', 'scope' => 'read-data' ]);Personal Access Tokens
Users generate their own tokens (like API keys):// User creates a token $token = $user->createToken('My Token')->accessToken;
🛡️ Protecting Your API
Add protection to routes using middleware:
// Protect route with authentication
Route::get('/profile', function() {
    return auth()->user();
})->middleware('auth:api');

// Require specific permissions
Route::post('/orders', function() {
    // Create order
})->middleware(['auth:api', 'scope:orders:create']);
🔍 Understanding Scopes
Scopes define what a token can do:
// Define scopes in AppServiceProvider
Passport::tokensCan([
    'user:read' => 'View your profile',
    'orders:create' => 'Place new orders',
    'orders:status' => 'Check order status',
]);

// Request scopes during authorization
$query = http_build_query([
    'scope' => 'user:read orders:status'
]);
Check scopes in your controllers:
if (auth()->user()->tokenCan('orders:create')) {
    // User has order creation permission
}
🧪 Testing with Passport
Passport provides testing helpers:
// Authenticate as user with specific scopes
Passport::actingAs(
    User::factory()->create(),
    ['user:read']
);

// Make test API call
$response = $this->get('/api/user');
🏁 Real-World Example: Building a Weather API
Imagine building a weather API accessed by mobile apps:
App developer registers:
php artisan passport:client --passwordGets client ID:
98765432, secret:abc123secretMobile app requests token:
axios.post('/oauth/token', {
  client_id: 98765432,
  client_secret: 'abc123secret',
  username: 'user@example.com',
  password: 'password',
  scope: 'weather:read'
})
API responds with token:
{
  "access_token": "eyJhbGciOi...",
  "expires_in": 31536000
}
App accesses protected data:
axios.get('/api/forecast', {
  headers: {
    Authorization: `Bearer eyJhbGciOi...`
  }
})
🚀 Pro Tips for Beginners
- Start simple: Use Personal Access Tokens for your first experiments
- Token expiration: Set sensible lifetimes
// In AppServiceProvider Passport::tokensExpireIn(now()->addDays(15)); - Revoke tokens when needed:
$user->tokens()->each->revoke(); - Purge old tokens regularly:
php artisan passport:purge
🎓 Conclusion: Your Security Superpower
Laravel Passport gives you enterprise-grade API security with:
- ✅ Multiple authentication flows
- ✅ Fine-grained permissions (scopes)
- ✅ Token management tools
- ✅ Built-in security best practices
Remember:
"Passport is for when you need professional API security - like giving different keys to residents, guests, and staff in your digital apartment building."
Now that you understand the basics, you're ready to implement secure API authentication in your Laravel applications! What will you build with your new security superpower? 🌟
Tags
Comments
No comments yet. Be the first to comment!
Please log in to post a comment:
Sign in with Google